Tomatillo Cheddar Grits
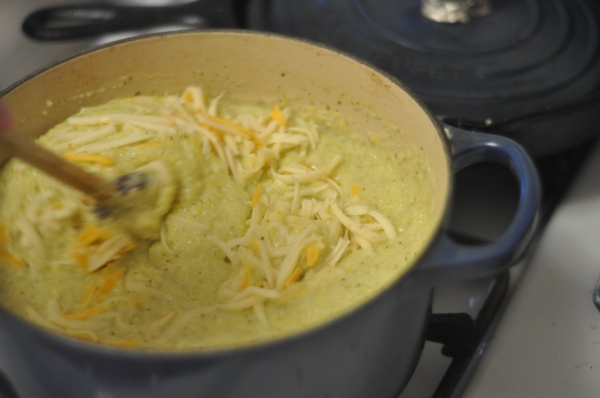
Until about a month ago, all I knew about tomatillos is that they’re green. I’d never even touched one, much less cooked with them. Well, you can officially consider me a tomatillo convert. These amazing little green tomato-looking things are usually really inexpensive (my grocery store sells them for $0.99/pound), really easy to use (just make sure you peel off the husk and give them a good rinse), and really tasty! They can be used similarly to tomatoes, but they require a little more prep work and have a different, tangier flavor.
Also, let’s talk about the difference between polenta and grits. First of all, I’m not entirely sure what the difference between the two is, other than one being Italian and the other being Southern. I’m sure people think polenta is classier than grits, since it’s Italian, which somehow inherently makes it “better.” Now for a a brief rant: the other day I saw a link to “10 Rules for Eating in Italy” and it was such freaking pretentious b.s. Apparently Americans are complete barbarians with no sense of appreciation for food, and doing anything in Italy that is not Italian is going to ruin your life and everyone else’s too. I’ve lived in a number of other countries, and I know that eating the food you are used to eating back home can be one of the most comforting things you’ll ever do. My husband wooed me with promises of lasagna when were in Peace Corps, for god’s sake. So, yes, make yourself eggs in the morning for breakfast and relish that barbequed chicken with loads of sticky sweet barbeque sauce. Chances are everyone already knows you’re a foreigner anyways.
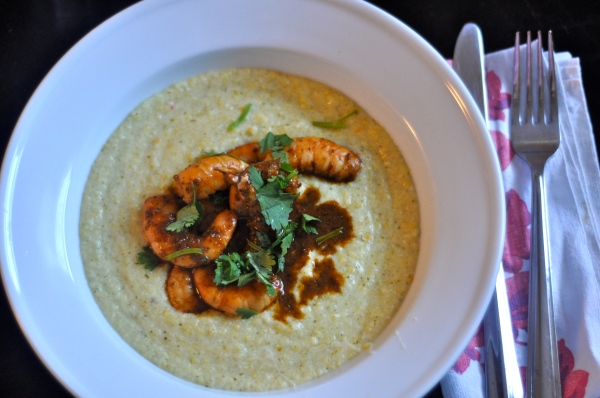
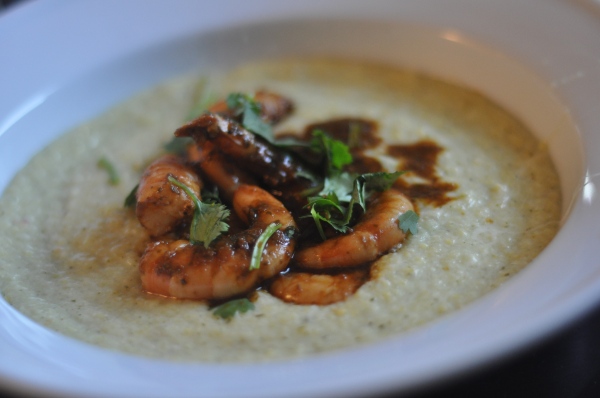
Anyways. We ate the grits with chile garlic shrimp, and the combination was amazing. This was the first time I’ve ever made grits, and now I’m emboldened to try other recipes. There is this restaurant in Atlanta called the Flying Biscuit that makes the best creamy cheese grits I’ve ever had… I swoon just thinking about it. Luckily I have the restaurant’s cookbook (which is sadly under-utilized) so I’ll have to give those a try next!
Tomatillo Cheddar Grits
Adapted from The Homesick Texan Cookbook
You might want to the cook the grits for a little longer than the package instructions say since you’ll be adding at least a cup of liquid with the tomatillo puree. I didn’t do this and the grits were a little runny (although still delicious). Also, if you use fresh tomatillos rinse them off after you remove the husks since sometimes they can be sticky and kind of gross. Make sure to use flavorful cheddar, otherwise you can’t really taste the cheese since the dish is so flavorful!
1 lb fresh tomatillos, husks removed, or 1 11-ounce can, drained
2 tbsp unsalted butter
1/2 medium yellow onion, chopped
4 cloves garlic, chopped
1 serrano chile, stems and seeds removed, diced
1/2 cup chopped cilantro
1/4 tsp cayenne
2 tbsp lime juice
1 cup grits
2 cups milk
2 cups water
1 cup grated cheddar cheese (4 ounces)
If using fresh tomatillos: on high heat, bring a pot of water to a boil and cook tomatillos until soft, about 5 minutes. Drain and place in a blender. If you’re using canned tomatillos just put them in the blender.
In a skillet, heat the butter on medium-low heat and cook onions until translucent, stirring occasionally, about 5 minutes. Add the garlic and cook for 30 more seconds, or until fragrant.
Put the onions and garlic in the blender with the tomatillos, diced serrano chiles, cilantro, cayenne, and lime juice. If necessary, add 1/4 cup of water and blend the ingredients until you have a smooth puree.
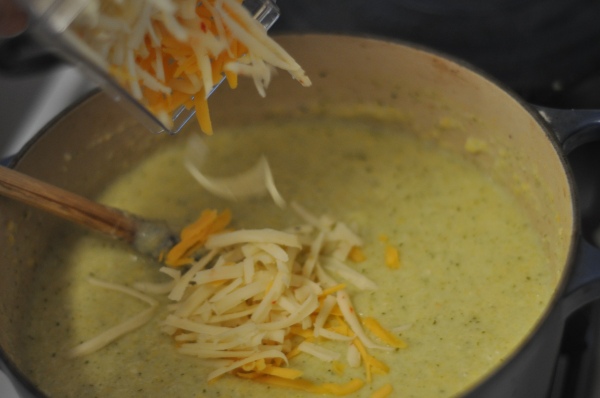
Cook the grits according to the package directions using 2 cups of milk and 2 cups of water. When the grits are done, stir in the tomatillo puree and cheese. Add salt and black pepper to taste and serve immediately.
Chile Garlic Shrimp
I love shrimp and grits. It’s one of my most favorite things to order just about every single time I go to a restaurant that serves southern food.
When we came home from our 10-day trip to the Midwest a couple weeks ago, there was hardly anything in the fridge and after eating out so much, the last thing we wanted to do was go to a restaurant. Eventually the unavoidable “What do you want to do for dinner?” “I don’t know, what do you want to do for dinner?” conversation started up and we decided to go with shrimp and grits. Really, I just wanted to spend some time in my own kitchen (yes, it’s tiny but it has everything that I need and I know exactly where everything is!), listening to music with the dog curled up at my feet in the middle of everything.
We had some frozen Gulf shrimp, and when we were peeling them we decided to pull off the tails. When you go to a restaurant, I can’t stand how they serve shrimp with the tails on, and then you either get your fingers all dirty or awkwardly try to use your knife and fork to pry the meat out of the tail. I know they look nicer with the tails on, but really, it’s just a pain in the butt. If I ever have my own restaurant, I know exactly how I’ll serve my shrimp!
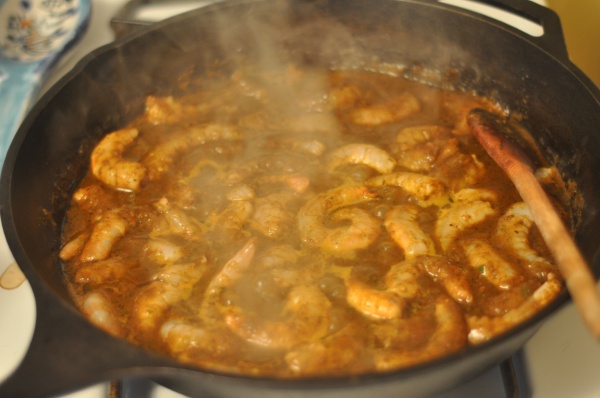
The shrimp turned out smokey with just a hint of spice and tons of flavor. I served them with tomatillo cheddar grits, which I’ll post in a couple days. After the amazing carnitas we made and perusing my friend’s copy of The Homesick Texan cookbook, we decided to buy our own copy. Well, this cookbook strikes again, and it is rapidly becoming our go-to with so many yummy, easy-to-make recipes!
Spicy Chile Shrimp
From The Homesick Texan cookbook
I used dried ancho chiles rather than dried pasilla chiles, since that’s what we had in the cupboard. Other than that, I didn’t change the recipe much at all. Another awesome thing about this recipe is that you make shrimp stock. I used the left-over shrimp stock in the grits, which was an awesome decision!
2 dried pasilla or ancho chiles, stems and seeds removed
2 lbs large shrimp, heads removed
1/2 c cilantro
4 cloves garlic
1/2 tsp ground ginger
1/2 tsp ground cumin
1/4 tsp cayenne
2 tbsp lime juice
4 tbsp unsalted butter
In a dry skillet (not a non-stick skillet) heated on high, toast the chiles on each side for about 10 seconds or until they start to puff. Fill the skillet with enough water to cover cover chiles. Leave the heat on until the water begins to boil, and then turn the heat off and leave the chiles in the water until they are soft (about 30 minutes).
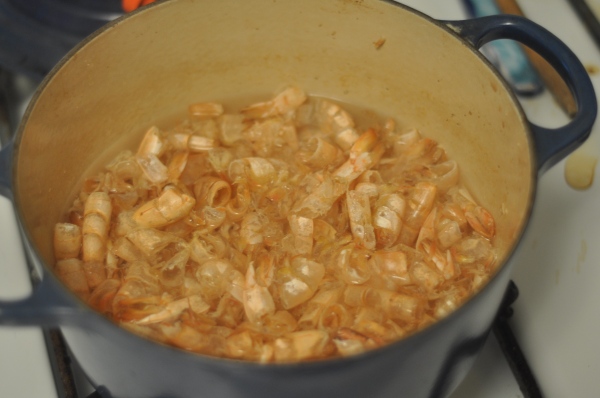
In the meantime, remove the shells and tails from the shrimp and place the shells/tails in a pot. Add 4 cups of water, 1/2 tsp salt and bring to a boil. Turn the heat down and simmer for 20 minutes. Pour the liquid and shells/tails through a sieve to separate the two so that you have shrimp stock (i.e. the liquid).
Rinse the rehydrated chiles and discard the soaking water. Put the chiles, cilantro, garlic, cumin, cayenne, lime juice, and 1 cup of the shrimp stock in a blender and puree until smooth.
Heat the olive oil in a large skillet on medium-low heat. Add the chile puree and cook for 10 minutes, stirring occasionally. Add the butter and 2 tablespoons of shrimp stock. When the butter has melted, add the shrimp with salt and pepper (to taste). Cook the shrimp for about 3 minutes on each side, or until pink. Remove shrimp and drizzle the chile butter sauce on top.
Peanut Butter, Pretzel, and Chocolate Brownies
Things have been kind of sucky lately… I have been grumpy and sullen, and I swear at everyone on the metro under my breath. It’s bad, folks.
Nate is a saint for putting up with my mood swings, and I seriously couldn’t ask for a better husband. His favorite dessert is brownies, and baking helps me blow off steam. So, baking a yummy pan of brownies has its rewards for both of us.
Have you tried the chocolate-covered peanut butter pretzels from Trader Joe’s? If you haven’t, you should because they are awesome. So awesome, in fact, that I can single-handedly eat a whole bag in a couple days. These amazing pretzels were my brownie inspiration.
I’ve made the same Cook’s Illustrated brownie recipe several times, and I decided it was time to diversify. Several months ago I tried the Ad Hoc at Home boxed brownie mix, and they were super yummy. If the boxed mix tastes so good, I figured following the actual recipe in the cookbook would give great results too. I am happy to say I was right!
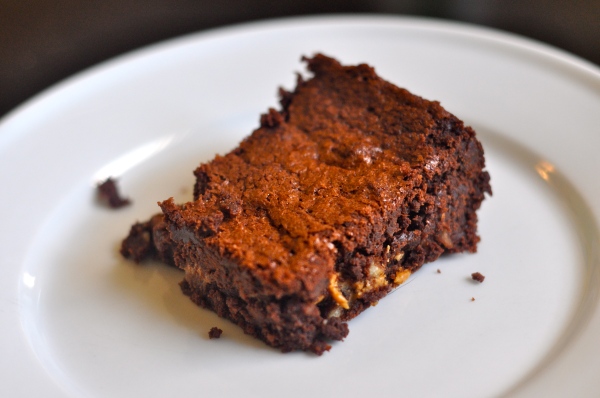
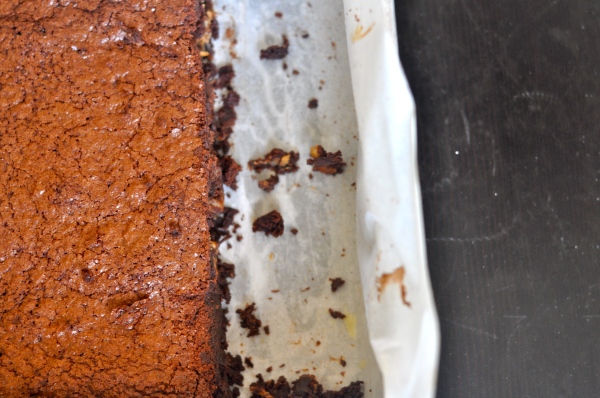
The brownies are a little crumbly, and they’re basically little brownie sandwiches packed with peanut butter, salty pretzels and chunks of dark chocolate. Nate almost ate a third of the pan in one sitting. They are also really good served with vanilla ice cream.
Peanut Butter, Pretzel, and Chocolate Brownies
Adapted from Ad Hoc at Home
I took some liberties with the recipe to make it a little more easily accessible, since I’m not one to make things that require ingredients that I need to order in advance. I used plain old cocoa powder instead of alkalized cocoa powder (I don’t even know what that is) and dark chocolate chips rather than finely diced 61-64% chocolate. The brownies came out great even with the substitutions!
3/4 cup flour
1 cup unsweetened cocoa powder
1 teaspoon kosher salt
1 1/2 cups unsalted butter (3 sticks), cut into cubes
3 large eggs
1 3/4 cups granulated sugar
1/2 teaspoon vanilla extract
3/4 cup dark chocolate chips
3/4 cup peanut butter
1 cup crushed pretzels
Preheat oven to 350 degrees. Grease and flour a 9×9 pan. Set aside. In a medium bowl, sift together flour, cocoa powder and salt.
In a small saucepan (or in the microwaveable glass bowl), melt half of the butter. Put the remaining butter into a medium bowl and pour the melted butter over the non-melted butter. Stir until remaining butter melts, and mixture is creamy with small bits of butter floating around.
In a stand mixer, mix together eggs and sugar for 3 minutes, or until pale yellow in color and thick. Add vanilla. With the mixer on lowest speed setting, alternate adding 1/3 of the sifted dry mixture and 1/3 of the butter until just combined.
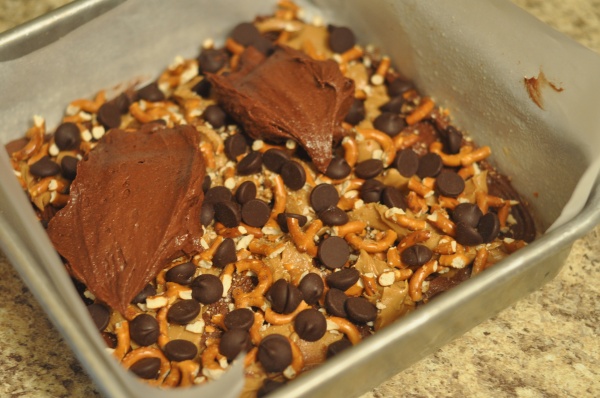
Spread batter half the batter into prepared pan and layer on the peanut butter, pretzel bits and chocolate chips. Cover with remaining half of brownie batter and bake for 40 to 45 minutes, or until a toothpick inserted in center comes out with a few crumbs sticking to it. Completely cool brownies in pan before cutting.
Garden Update: May/June
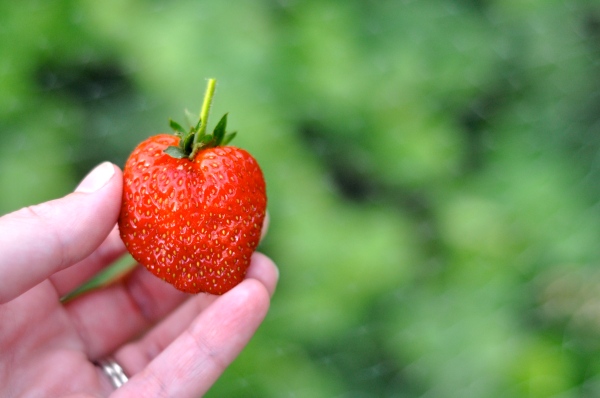
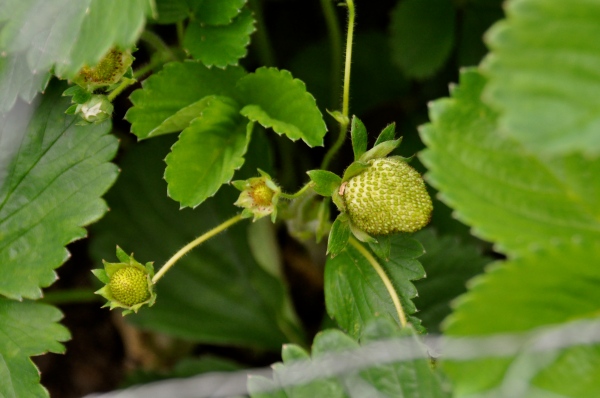
Our #1 “crop” for May was strawberries. I was picking a pint or more every couple of days for most of the month, until I spent the last two weeks of May in Ecuador and then in Wisconsin and Illinois. I am glad we planted the strawberries in 2′ x 8′ beds since that makes it easier to actually find the strawberries.
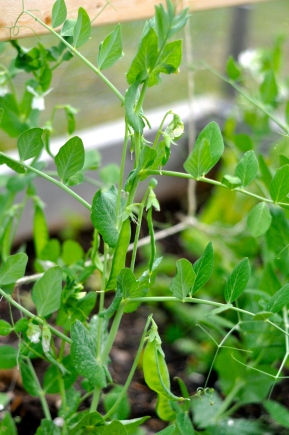
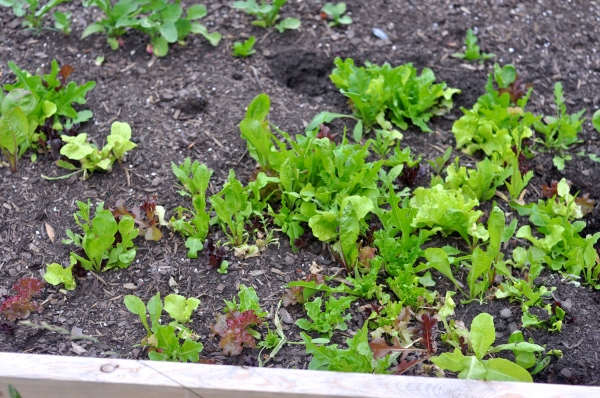
The snap peas also maxed out in May, and now they look like they’re starting do die off. The salad greens are doing extremely well, and I read that you can snap off the top of the plant, leaving the root, and then you have perennial greens. We’re going to give that a try, although I will sprinkle on more arugula seed in August since my first attempt at “sprinkling” seeds appears to be more like a seed dump in certain areas (based on the massive clusters of greens that have sprung up, compared to relative sparseness in other areas):
There also appears to be some sort of animal that is crawling around in our greens and digging stuff up. I know it wasn’t the dog since she was inside all day and the holes weren’t there in the morning…. it had better not be that pesky fox in our neighborhood that we hear screaming the wee hours of the morning…
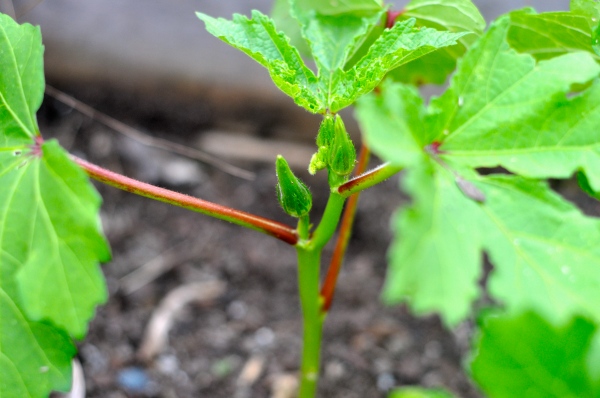
The carrots are coming along and the green parts keep growing, but the beets aren’t doing so well. Maybe we just don’t have soil that’s well-suited for beets, but they’re pretty pathetic. The pole beans are growing, and so are some other seeds that I planted… I don’t remember exactly what they are. Perhaps cucumbers or squash… we’ll see. Oh, and the okra is coming in! I think I may have crowded the plants, but I still consider our garden to be one long learning process. Now I know for next year.
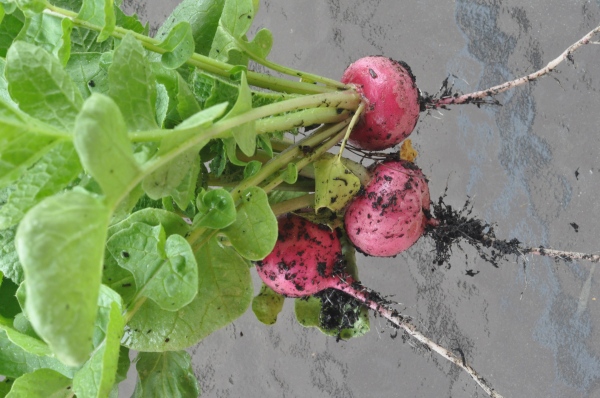
I harvested a bunch of radishes, and they were pretty spicy. I tried just taking a bit out of one and eating it like that, and I wound up spitting it out in the sink it was so spicy and running for a glass of milk… they taste much better sliced up in salads.
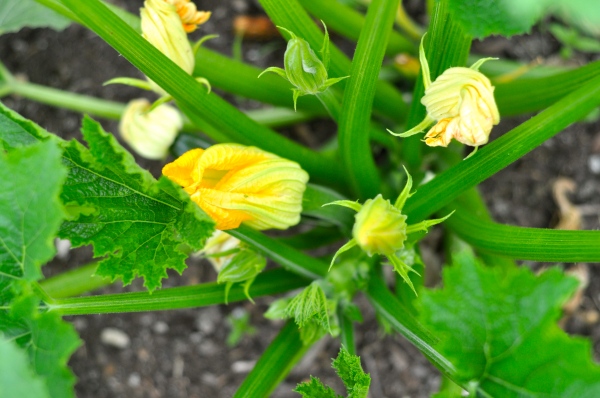
Our zucchini is also starting to grow like crazy. The bushes just seem to be producing little baby zucchinis and then they start to rot, so we’ve been picking them when they’re little. We also crowded the zucchini plants. Lesson learned.
I’ve completely given up on calculating how much we’re saving by gardening rather than going to the farmer’s market. It was getting really tedious and half the fun of having a garden is standing out there munching away on the strawberries or snap peas right off the plant/vine.
June looks like it should be a promising month, and our blackberries are already starting to get black!!
Asparagus and Mushroom Quiche
You know what?
I’ve never made quiche before.
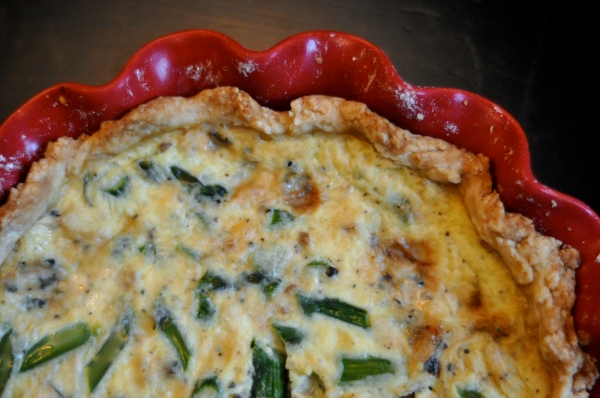
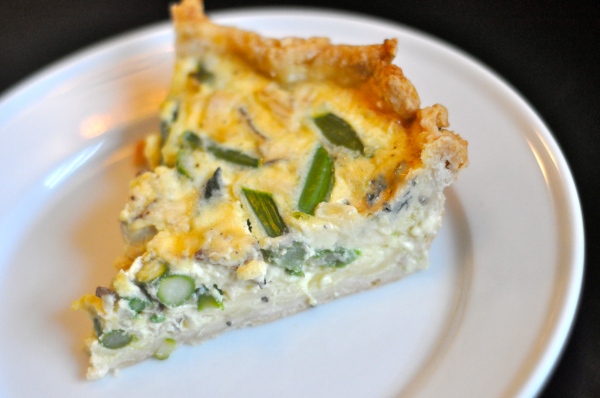
It’s true. And I have no idea why. I’m considering making lots of pie crust dough and then just storing it in the freezer so I can make it more often because, my friend(s?), this quiche was amazing. Then again, it had better have been amazing since I decided to make it completely from scratch on a Monday night after work and it wasn’t finished until 9:15. I also dropped not one, but two, pie plates in the process, sending little pieces of glass and ceramic all over the kitchen. Looking on the bright side, at least I didn’t drop the pie plate with the quiche in it! There was a lot riding on this quiche by the time it finally came out of the oven (including my emotional sanity).
Luckily it was everything I hoped it would be: creamy, flavorful and cheesy, and the crust was perfect. Perfect. It was definitely worth the annoying pre-baking, which is always such a pain-in-the-butt and one of my least favorite things to do. The crust was just as good as the filling, which is not something that happens frequently.
I had to restrict myself to only eating half of the pie plate (yes, I ate half of something meant for eight people), it was that good. The slices also traveled remarkably well, and I’ve been enjoying quiche for breakfast at work. Definitely a step up from my usual plain yogurt and fruit!
Asparagus and Mushroom Quiche
Adapted from Baking Illustrated
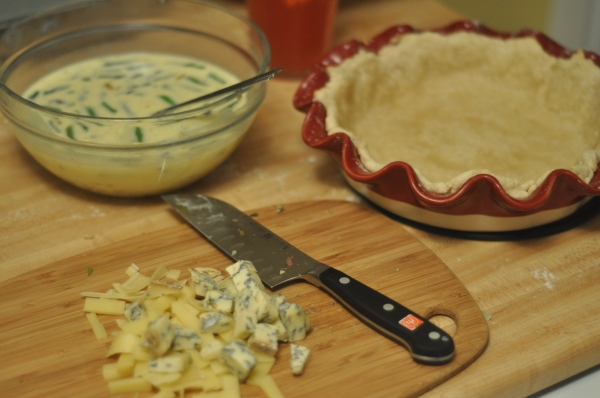
One thing I love about this recipe is that it’s open for interpretation (Chris Kimball would probably kill me if he read that, but luckily I’m certain he has absolutely no idea who I am). You could add in other veggies or protein that you have that you’re trying to use up, like peppers, zucchini, bacon, ham, sausage, spinach, or broccoli. I also used up all the different nubs of cheese lying in the cheese drawer, which included some deli sliced swiss, a handful of blue cheese, and even some Laughing Cow rounds.
2 eggs
2 egg yolks
3/4 cup whole milk
3/4 cup heavy cream
1/2 tsp table salt
1/2 tsp ground pepper
A pinch fresh grated nutmeg
4 oz (1/2 cup) Gruyere cheese, grated
1/2 cup sliced mushrooms or reconstituted dry mushrooms, chopped
1/2 cup diced onion
8 asparagus spears, cut on the bias into 1/2 inch pieces (~1 cup)
9-inch partially baked pie shell (warm), baked until light golden brown, about 10 minutes
Adjust oven rack to center position and heat oven to 375 degrees. Blanch asparagus in 1 quart salted boiling water until crisp-tender, about 2 minutes. Drain thoroughly. Sautee mushrooms and onion over medium heat for 3-4 minutes, or until softened
Whisk all remaining ingredients except cheese, asparagus and mushrooms in medium bowl. Spread cheese, asparagus and mushrooms evenly over bottom of warm pie shell (if the pie shell has been previously baked and cooled, place it in the preheating oven for about five minutes to warm it, taking care that it does not burn).
Set shell on oven rack. Pour in custard mixture to 1/2-inch below crust rim. Bake until lightly golden brown and a knife blade inserted about one inch from the edge comes out clean, and the center feels set but soft like gelatin, 45 to 50 minutes (the center of the quiche will be soft when it comes out of the oven, but the filling will continue to set–and sink somewhat–as it cools). Transfer quiche to rack to cool. Serve warm or at room temperature.
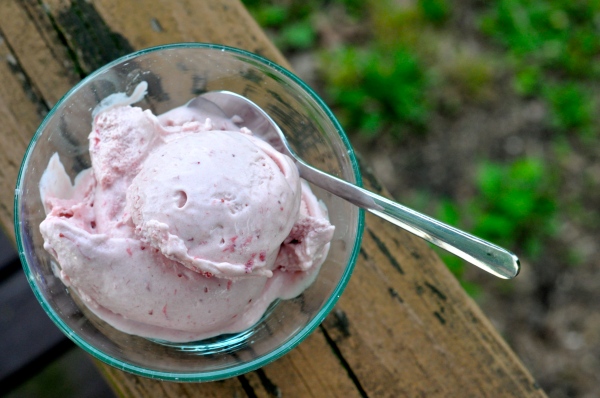
Strawberry Ice Cream
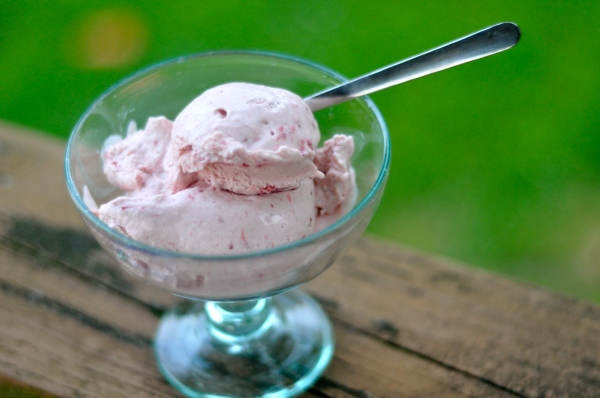
I’ll just tell you now that you’re lucky there was any ice cream left for me to take pictures of. If I hadn’t been worried about accidentally dropping my spoon in the ice cream maker while it was still churning (thereby tragically breaking my new favorite kitchen gadget), I probably could have eaten it all right then and there. By myself.
Over the past week I’ve been picking about a pint of strawberries from the garden every two days. While most of them are devoured standing over the kitchen sink, sometimes I slice them up and eat them with freshly whipped cream, or I put them in my morning yogurt. I also plan on making strawberry cake and some cupcakes. Have I mentioned yet that planting strawberries last year was the best idea ever? (“Ever” meaning “as far as planting stuff in our garden is concerned.”)
I decided to save a pound of berries for ice cream, which is a decision I did not regret.
I suppose this is actually custard rather than ice cream, since it contains egg yolks. But the recipe comes from the Ciao Bella Gelato cookbook, so is it gelato? I have no idea.
I could taste the eggs in this recipe more-so than in other recipes I’ve made from this cookbook (which all use the same general base recipe), maybe because the strawberry flavor isn’t quite as strong as lots of chocolate and mint. Ice cream making remains a bit of a mystery to me, since I know there are well-balanced guidelines for the amount of fat and sugar that ice cream needs to contain to be smooth and creamy. Perhaps eventually I’ll feel comfortable enough to try my own variations, but for now I am perfectly happy following the recipes exactly as they are written, since the results are amazing!
Strawberry Ice Cream (Custard/Gelato)
From Ciao Bella Gelato
2 cups whole milk
1 cup heavy cream
4 large egg yolks
2/3 cup sugar
1 lb strawberries
1/4 cup sugar
1 tbsp lemon juice
Combine milk and cream in a medium sized saucepan. Stir to prevent skin from forming. Heat until bubbles begin to form around the edges (temperature should be ~170ºF if you’re using a thermometer).
While heating the milk/cream, whisk egg yolks together. After 1 minute, add in the 2/3 cup of sugar and continue to whisk until the yolk-sugar combination becomes thick and pale yellow.
Next, temper the egg yolks by slow pouring the 1 cup of hot milk into eggs while whisking constantly. Then slowly pour the milk/egg mixture into the rest of the milk, whisking constantly.
Then, pour the mixture back into the saucepan and cook stirring constantly. It is ready when the custard is thick enough to coat the back of a spoon (~185ºF).
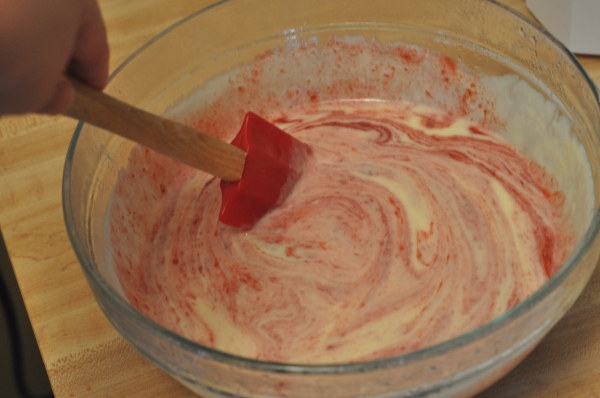
Combine the strawberries, 1/4 cup sugar and lemon juice in a medium saucepan. Simmer over medium heat for about 10 minutes, or until the mixture starts to thicken and the strawberries are soft. Refrigerate for at least 2 hours (can be prepared a day in advance). Pour 3/4 of the strawberry mixture into a blender and puree until smooth. Mix into custard.
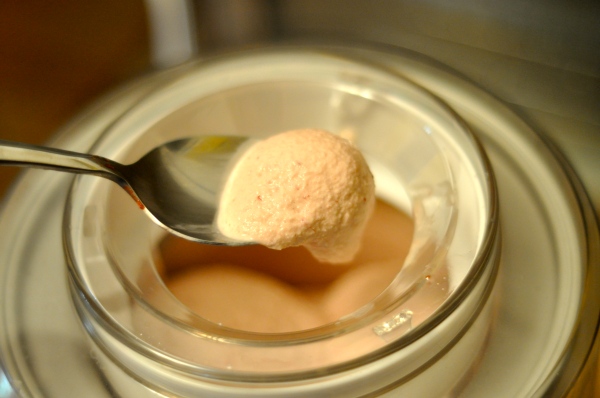
Churn ice cream according to ice cream machine manufacturer’s directions, adding in remaining strawberries during the last 5 minutes of churning.
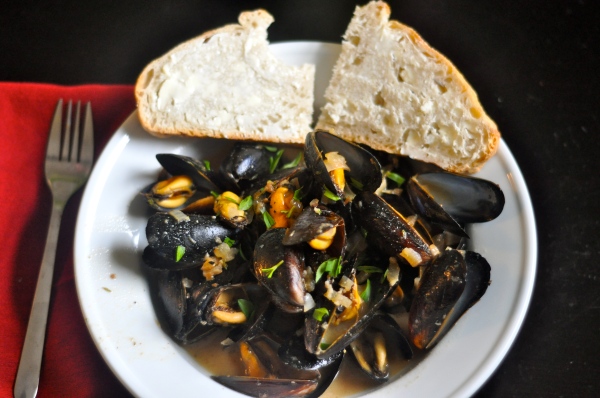
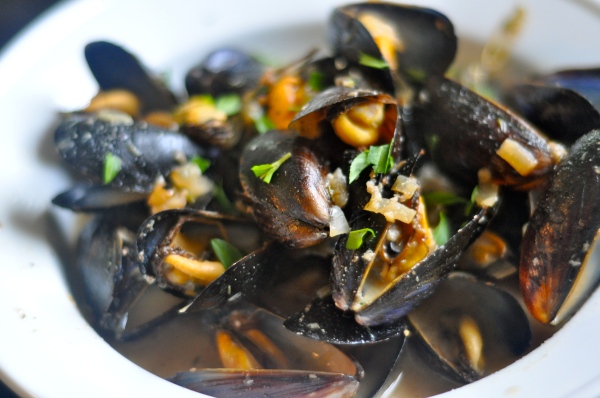
Mussels in Beer, Garlic, and Mustard
Steamed mussels are so ridiculously easy to make, I don’t know why I always save them for a weekend “project.” Really all you need to do is let the mussels soak for about 30 minutes, during which time you get your steaming liquid ready, steam them for 10 minutes, and that’s it. Less than 45 minutes! And you feel like you’re eating something that came out of a restaurant kitchen. It’s amazing what restaurants charge for mussels when it’s one of the easiest things to make on the menu.
This recipe is my new favorite for making steamed mussels. The mustard somehow highlights all the other flavors for a really well-seasoned broth that is just delicious. Pair it with some crunchy freshly baked bread and that’s all there is to it.
You can serve these mussels to guests (who will probably only have eaten steamed mussels in a restaurant and will be very impressed), or you can have it as a quick week-night meal. I don’t know of many recipes that easily fall into both of those categories!
Beer-Steamed Mussels with Garlic and Mustard
Adapted from The New York Times
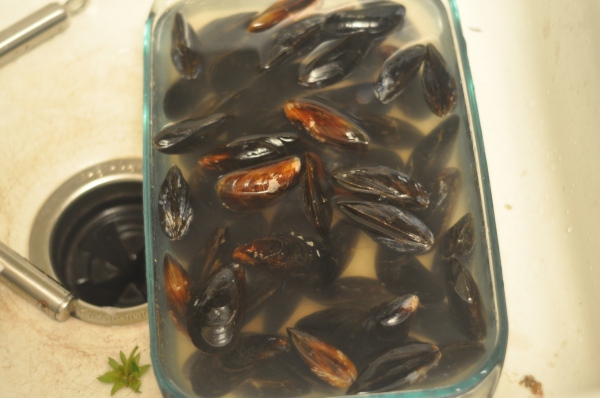
If you use tarragon, make sure to chop it really finely, otherwise the flavor can be a little overwhelming. Also do not add too much mustard, or it will be all you taste in the broth. There are a number of different ways to prep your mussels, and this recipe originally said to just run them under cold water. I like to let them sit in the water for at least 15-20 minutes to filter out some of the sand and brine inside the mussels. The best way to store mussels after you bring them home is in a large dish in the fridge, covered with a damp towel so that they can breathe. Most mussels are packaged in a mesh net, and make sure you cut open the net so they’re not all squished together. When getting ready to use the mussels, throw away any that are open and won’t close when you tap them with you finger. And, as you probably know, don’t eat the ones that don’t open after cooking! Also, the NYT recipe calls for ale, but I just had lager… I’m fairly confident you could use almost any beer beer for this recipe, although personally I wouldn’t use a light beer, like Miller Lite, because light beer is gross and I never have it on hand.
2 pounds mussels in shells
1 tablespoon olive oil
4 full sprigs of thyme
3 garlic cloves, minced
2 large shallots, chopped
Kosher salt and freshly ground black pepper
3/4 cup good beer
1 to 3 tablespoons butter, to taste
1 tablespoon chopped fresh tarragon or parsley
1 teaspoon Dijon mustard
Crusty bread, for serving
Soak the mussels in cold water for 20-30 minutes. If you see hairy clumps around the shell (called beards), use a sharp knife or your fingers to pull them off, then scrub shells well with a vegetable brush.
In a soup pot with a tight-fitting cover, heat olive oil, then add thyme, garlic, shallots and a pinch of salt and pepper. Sauté until shallots and garlic are softened, 3 minutes. Pour in ale and bring to a simmer. Add mussels and cover pot. Let mussels steam, stirring once or twice, until they open, 5 to 10 minutes. Use a slotted spoon to transfer mussels to bowls. Discard any that have not opened.
Add butter, herbs and mustard to pan juices and bring to a boil. Whisk until butter melts, then taste and correct seasonings (add more butter if liquid tastes bitter). Pour over mussels and serve with bread for sopping up juices.
Jacked-Up Banana Bread
You know what they say…. if it ain’t broke, don’t fix it. Jacked-up, indeed.
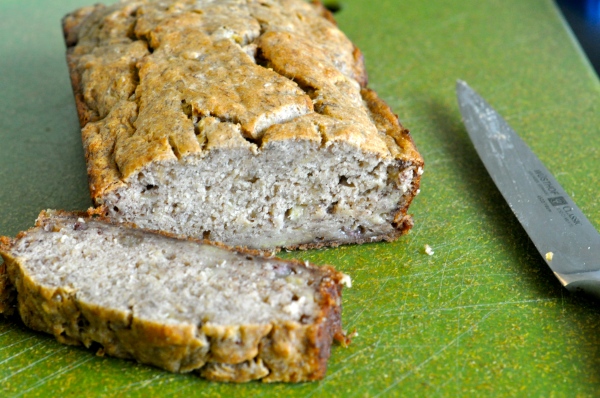
I have a fantastic banana bread recipe that is my go-to recipe, so I don’t know why I was inclined to try a new recipe. Anyways, maybe it was because it was before 9 am on a Saturday morning, maybe I was being lazy, or maybe I just didn’t read the recipe correctly, but I forgot to add sugar to this banana bread. So I don’t know if the reasons why I don’t love this banana bread are because I forgot the sugar, if this recipe just isn’t as good as my go-to recipe. Interestingly, my main complaint about this banana bread isn’t it’s lack of sweetness– I actually don’t miss the sugar (Nate did, though)– but rather that the outside isn’t crunchy, the loaf is a bit dense, the bottom is particularly dense, and it’s all a bit mushy.
Really I should try making it one more time, just to be fair. But, hey, if you want a recipe for banana bread that requires no sugar (and you’re not as picky about the details), here you go!
It came out of the oven looking nice and puffy and perfect, and then as it cooled it just kind of fell in on itself. And, I know it sounds silly, but I was really bummed out by the lack of crispy crust. It really is the little things that matter most!
With that, I think I can safely count this as a “fail.”
 Jacked-Up Banana Bread
Adapted from Smitten Kitchen
This banana bread is quick and easy to make, and you only need one mixing bowl. I added some crystallized ginger nibs for some extra texture and flavor.
3 to 4 ripe bananas, smashed
1/3 cup melted salted butter
3/4 to 1 cup light brown sugar [or none, if you feel like it (or forget…)]
1 egg, beaten
1 teaspoon vanilla
1 tablespoon bourbon (optional)
1 teaspoon baking soda
Pinch of salt
1 teaspoon cinnamon
1/2 teaspoon nutmeg
1/2 teaspoon ground ginger
Pinch of ground cloves
1 1/2 cup of flour
Preheat the oven to 350°F. With a wooden spoon, mix butter into the mashed bananas in a large mixing bowl. Mix in the sugar, egg, vanilla and bourbon, then the spices. Sprinkle the baking soda and salt over the mixture and mix in. Add the flour last, mix. Pour mixture into a buttered 4×8 inch loaf pan. Bake for 50 minutes to one hour, or until a tester comes out clean. Cool on a rack. Remove from pan and slice to serve.
Fried Flounder Po’ Boys
Flounder is my new favorite week-night fish. It’s so versatile and you can do just about anything with it. It’s nice, light, and flakey, and usually it’s on sale at Safeway. No more tilapia for me!
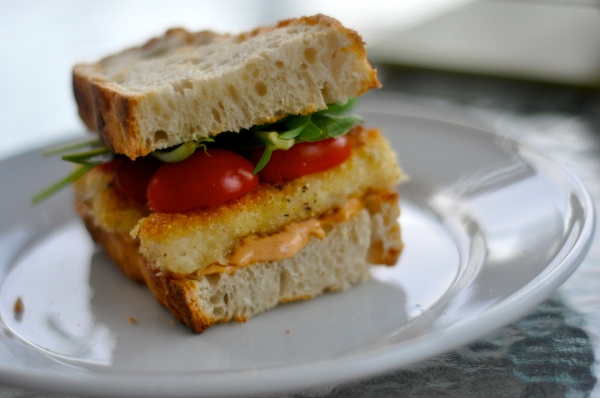
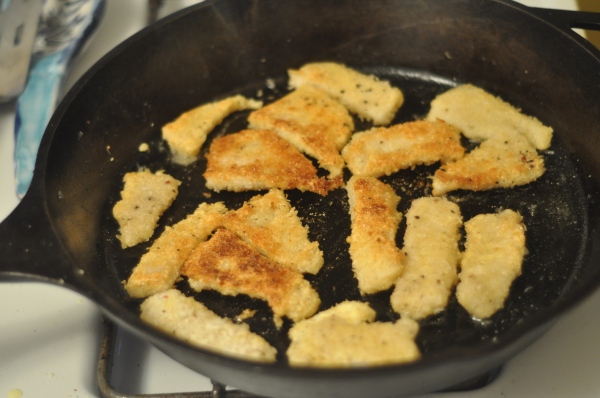
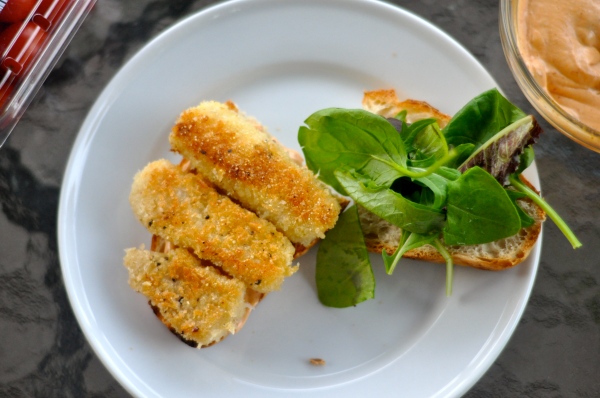
The other day I went grocery shopping and bought a pound of flounder, only to discover it’s sell-by date was that very day. (Which I guess explains why it was on sale!) I didn’t want to just pan fry all of it, since I wanted to be able to do different things with the left-overs. I’d made a loaf of bread earlier in the day, so I decided I would bread and fry some of it for sandwiches, and pan fry the rest (purpose as of yet undetermined, especially since it strangely dissolved in the pan…).
I found Martha Stewart’s recipe for Po’ Boys with flounder and spicy tartar sauce, and, as you would expect from the culinary queen herself, this is one right-darn-tasty sandwich. I seriously ate the whole thing in like 3 minutes. It was a bit messy and the fish kept popping out, but that’s nothing you can’t just solve with your hands and a napkin. Yet another tasty way to use my new favorite fish!
Fried Flounder Po’ Boys
Adapted from Martha Stewart
1/2 cup flour
1 egg, beaten
1/3 cup panko
1/3 cup cornmeal
Coarse salt and ground pepper
2 tablespoons canola oil
1 (8-ounce) baguette (or sliced hearty bread)
Spicy Tartar Sauce (recipe below)Lettuce and sliced tomato, as sandwich toppings
From Martha Stewart
This sauce is hardly any work and is a great addition to the sandwich! I used sriracha and found that I didn’t need any additional hot sauce.
2 tablespoons chili sauce
2 tablespoons chopped fresh parsley
2 tablespoons grainy mustard
2 tablespoons chopped gherkins or pickles
Hot sauce, such as Tabasco
Garden update: April
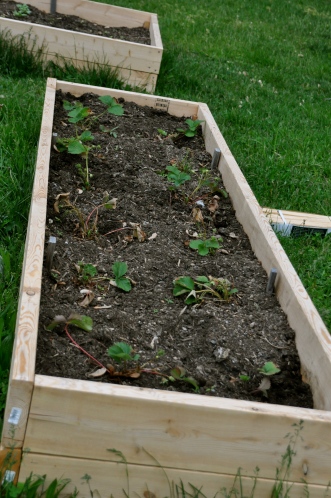
April was an interesting month for the garden. We put dirt in the new beds, planted a bunch of seeds, planted some little tomato and pepper plants, and transplanted some strawberries. As far as the seeds go, things are great, but I think I planted the tomatoes and peppers to early, even though I made myself wait. Oops.
I spent a Saturday morning weeding the strawberry bed and transplanting some of the newly-formed plants to our second (new) strawberry bed. Maybe I just don’t have a gentle-enough touch to transplant things, but most of those strawberry plants died. Oops again. Luckily there were plenty more where those came from, so the second time around I dug deeper and wider to ensure I had as much of the root structure as possible. As you can see, some of the transplants still look brown and sad, but they’re not wilted and 100% dead (like the first transplants), so I’m hoping they’ll soldier on.
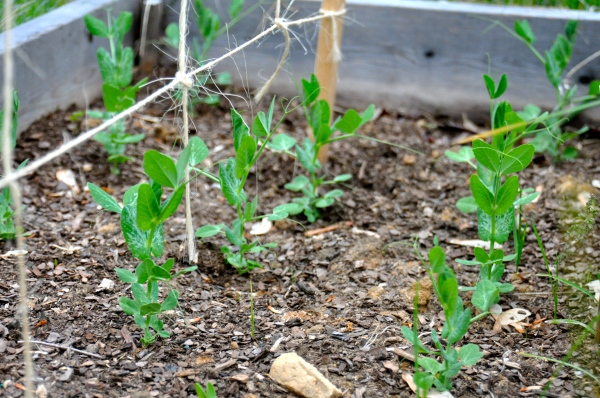
We have snap peas and green beans going strong in the trellis bed, and I’m still waiting for the watermelon and pickling cucumbers to sprout. We have two zucchini bushes starting to form, some regular cucumber bushes and some little okra seedlings. So far the beets don’t look promising…. I poured in like half a seed packet and only three little plants seem to be doing well. The carrots are starting to take off, and now I’m busy thinning them. The radishes are really starting to grow, and hopefully we’ll have arugula and other greens in a few weeks! Here are the snap peas growing strong:
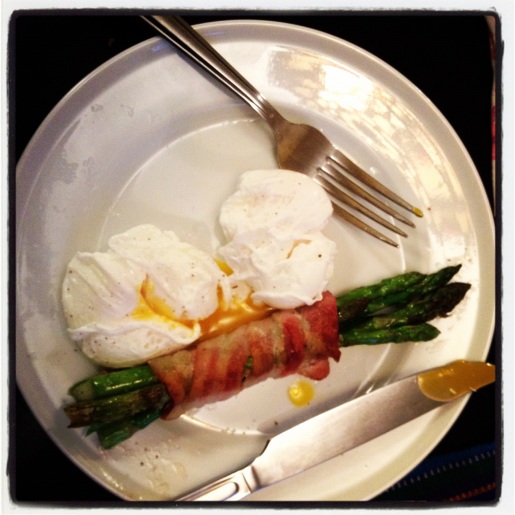
We got about half a pound of asparagus from the garden this year. It would have been double that, but it was perfect for picking while we were in Guatemala, which we discovered when we came back. Oops, for the third time. At least this will give the roots a chance to keep growing. A number of people have asked why we’re growing trees in our garden beds and they have all been confused when we tell them it’s asparagus.
At least I was able to get a couple of yummy meals with our garden asparagus!
As for a financial break-down, we’ve spent $198 on our garden beds and supplies (dirt is expensive!) this year, and we’ve only harvested 1/2 a pound of asparagus, which wouldn’t cost much at the farmers market. We are solidly in the red. Hopefully things will turn around when the weather is more consistently warm. Strawberries, I’m counting on you!
Saving the best for last, the big news around here is that we finally got a new fence. Our old chain link fence was looking kind of ghetto and we decided to just bite the bullet. The company that we went with, Loudoun Deck and Fence, did an amazing job (they worked for ten hours straight, pulling out the old chain link and putting up the new fence, all in one day) and we would definitely recommend them! Also, if you’ve ever wondered about joining Angie’s List, do it. The discounts you get make up for the cost of joining (around $40) and you know you’re picking a good contractor!
